
Overview
Two-Factor Authentication (2FA) adds a second layer of security to ScrapRight user logins. In addition to a username and password, each user confirms their identity with a 6-digit code generated by an authenticator app on their phone.
This guide covers:
- Enabling 2FA for your organization (administrators)
- First-time setup each user completes at their next login
- Backup codes for recovering access if a device is lost
- Trusted devices so users are not prompted for a code at every login
- Managing user 2FA settings such as resets and revoking trusted devices
We recommend using Google Authenticator or Microsoft Authenticator, available free in the App Store and Google Play. Any standard TOTP authenticator app will work.
Step 1: Enable 2FA for Your Organization
An administrator enables 2FA for the entire organization from the organization configuration screen.
- Navigate to Admin > Configuration > Organization > Organization Configuration.
- Check the Enable Two-Factor Authentication checkbox.
- Save your configuration.

The Enable Two-Factor Authentication setting in Organization Configuration
|
Important: Once enabled, every existing user is required to complete 2FA setup the next time they log in. Let your team know before you turn it on. Disabling the setting later suspends 2FA without clearing user secrets, so users who have already enrolled will not need to set up again if it is re-enabled. |
Step 2: First Login and Initial Setup
After 2FA is enabled, each user completes a one-time setup at their next login. Start by signing in with your normal username and password.
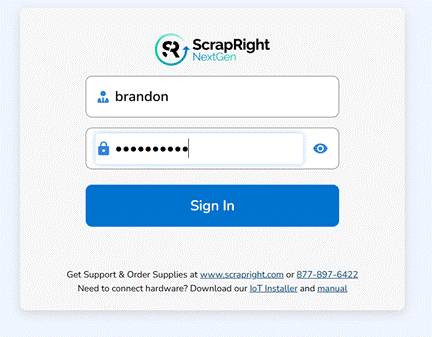
Sign in with your ScrapRight username and password as usual
ScrapRight then displays the two-factor setup screen with a QR code.
- Install Google Authenticator or Microsoft Authenticator on your phone if you do not already have one.
- Open the app and scan the QR code shown on the screen. If your camera cannot scan the code, type the manual entry code into the app instead.
- Once the account is saved in your authenticator app, enter the 6-digit code it displays into the Verification code field and click Verify And Continue.
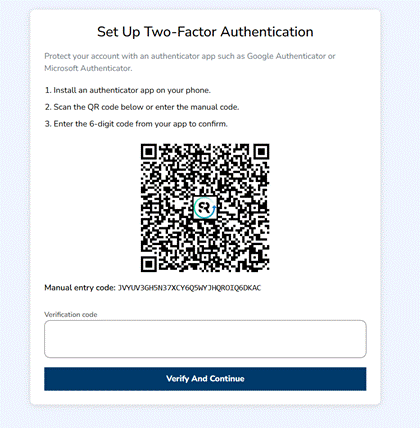
Scan the QR code with your authenticator app, or use the manual entry code
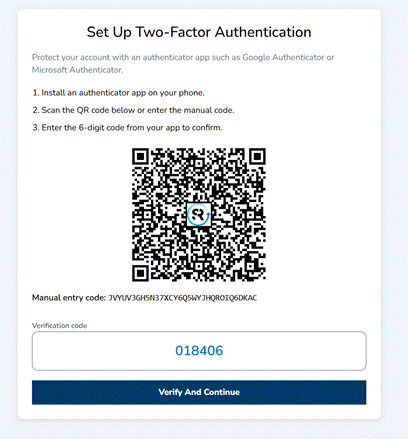
Enter the 6-digit code from your app and click Verify And Continue
|
Note: Codes refresh every 30 seconds. If a code expires while you are typing, just enter the new one shown in the app. |
Step 3: Save Your Backup Codes
After verification, ScrapRight generates a set of backup codes. These are used to sign in if the device with your authenticator app is ever lost, broken, or replaced.
- Print the codes or save them somewhere safe, such as a password manager.
- Check I have saved my backup codes.
- Click Continue To ScrapRight. You will be logged in and setup is complete.
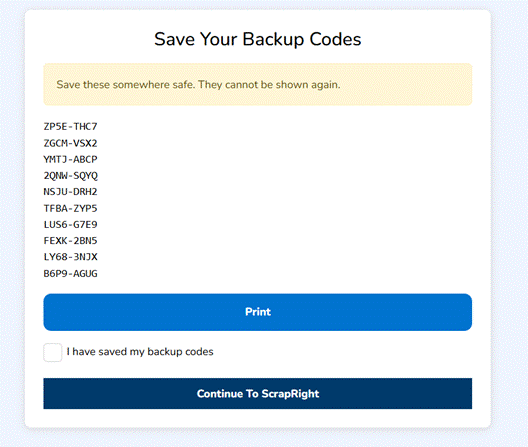
Save or print your backup codes before continuing
|
Important: Backup codes cannot be shown again after this screen. Each code works once. To sign in with one, click "Use a backup code instead" on the verification screen at login. |
Step 4: Logging In and Trusted Devices
On each login after setup, ScrapRight asks for the current 6-digit code from your authenticator app.
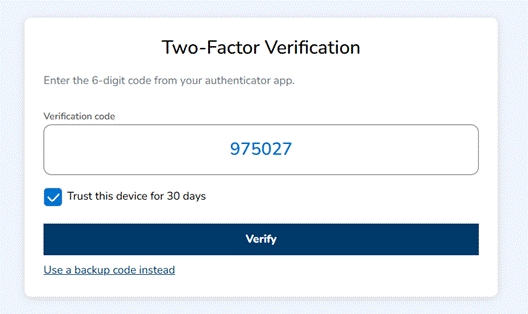
The verification prompt at login, with the Trust this device option
Select Trust this device for 30 days before clicking Verify and ScrapRight will not ask for a code again on that device for 30 days. After 30 days, or if you sign in from a new device or browser, you will be prompted for a code again.
|
Tip: Only trust devices that are physically secure and not shared, such as your own workstation. Avoid trusting shared scale-house or kiosk machines. |
Step 5: Managing a User’s 2FA Settings
Administrators can manage 2FA for any user from the user’s profile. Go to Admin > Users, select the user, and open the Two-Factor Auth tab.
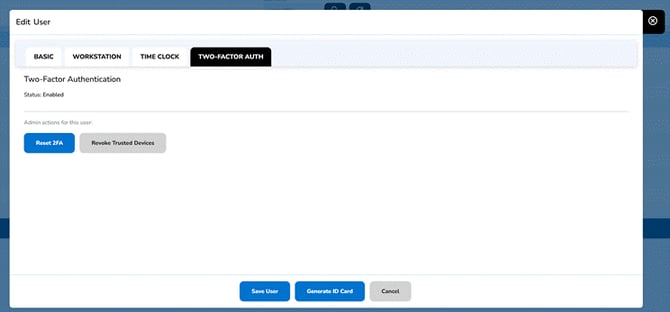
The Two-Factor Auth tab on the user profile with admin actions
Two admin actions are available:
- Reset 2FA - starts the setup process over from the beginning. Use this when a user gets a new phone or otherwise needs to enroll a new device. The user will be walked through Steps 2 and 3 again at their next login.
- Revoke Trusted Devices - removes all of the user’s saved trusted devices. The user will be asked for a 2FA code at their next login on every device.